



- In your Buildpeer account, go to the project overview and select the project you want to enter.
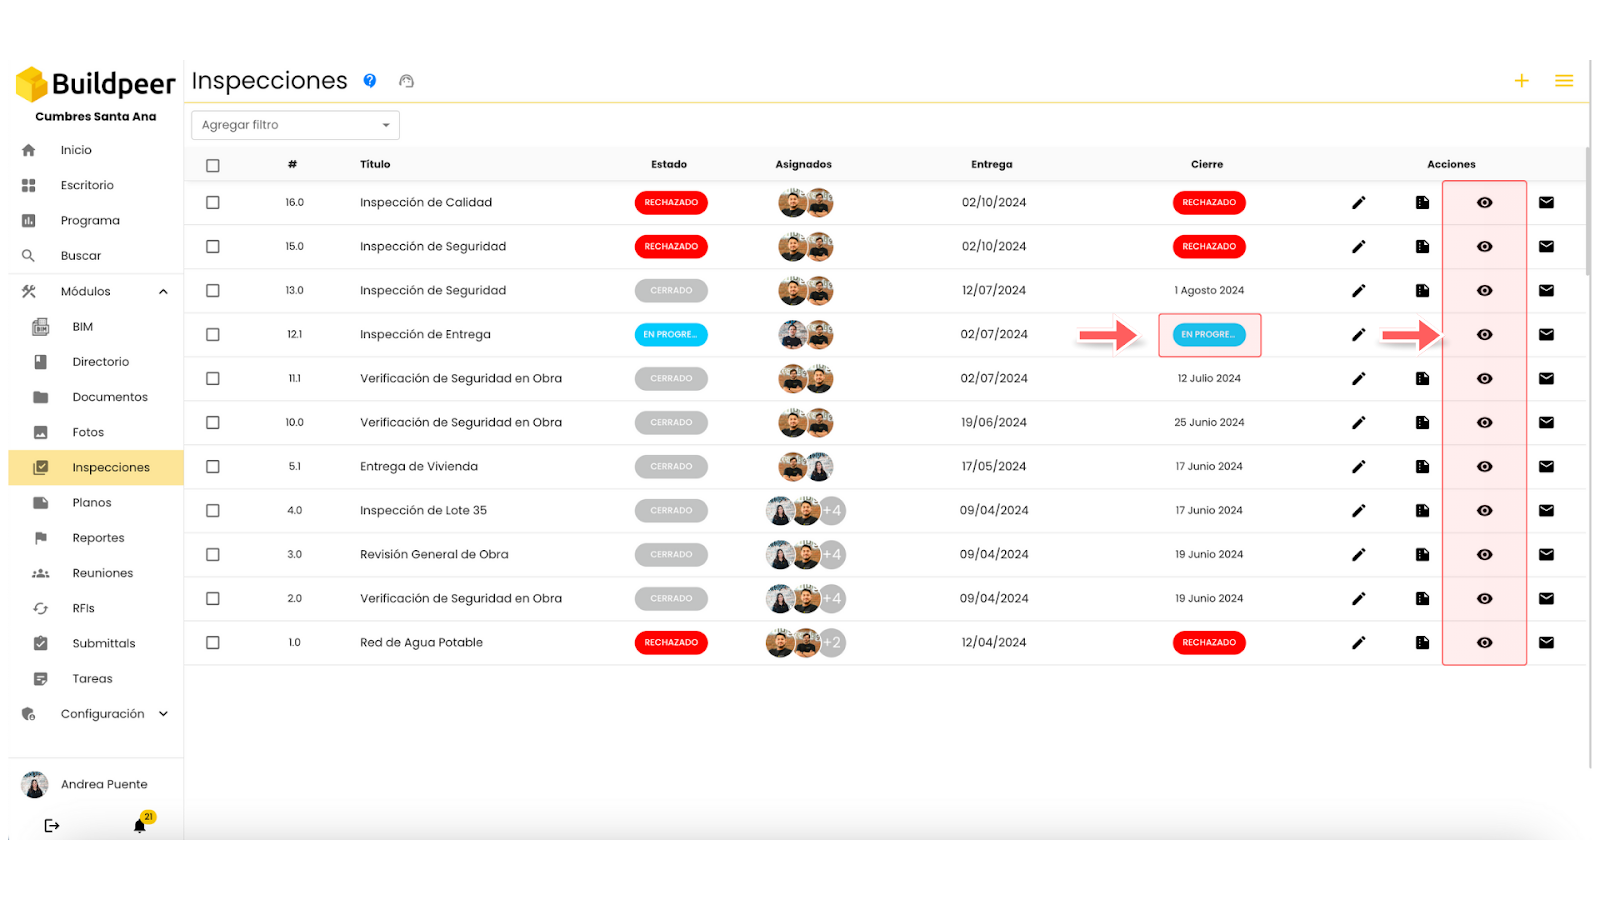
- In the left sidebar, click on the section 'Modules', and then click on the module 'Inspections'.
- On the main screen of the module, you can view all your inspections classified according to their status: In progress, Rejected O Closed. To make changes to an inspection, make sure it's in good condition In progress. Then, click on the icon 👁️ View details to access the inspection.
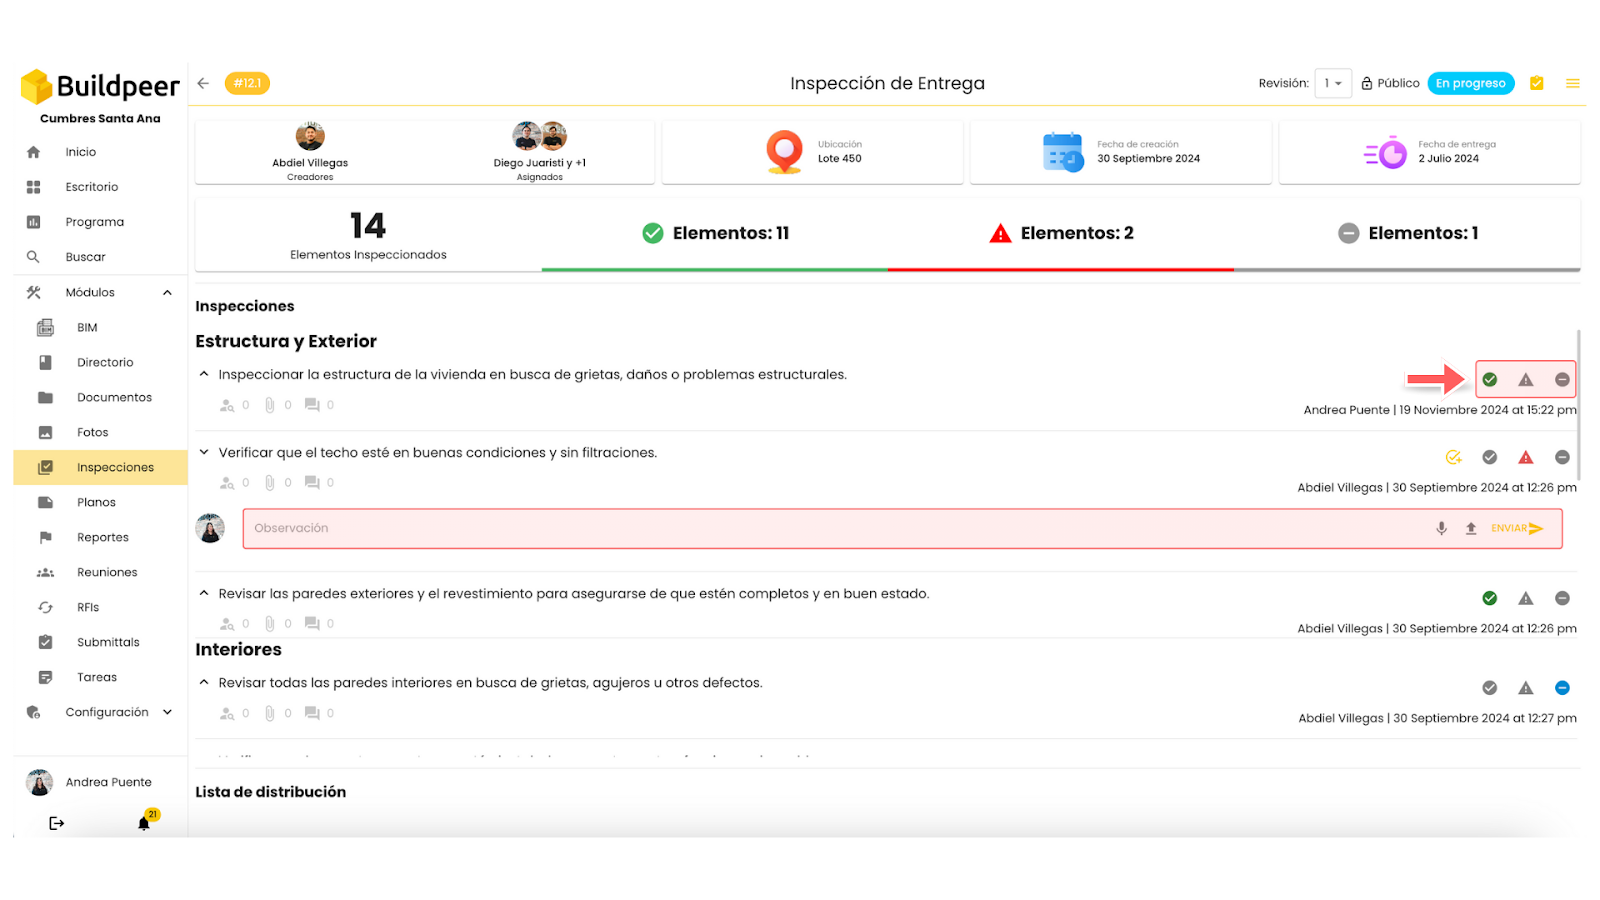
- In the list of inspection items, you can approve or reject each item as appropriate. You'll also have the option to add observations, attach files, or even create related tasks.
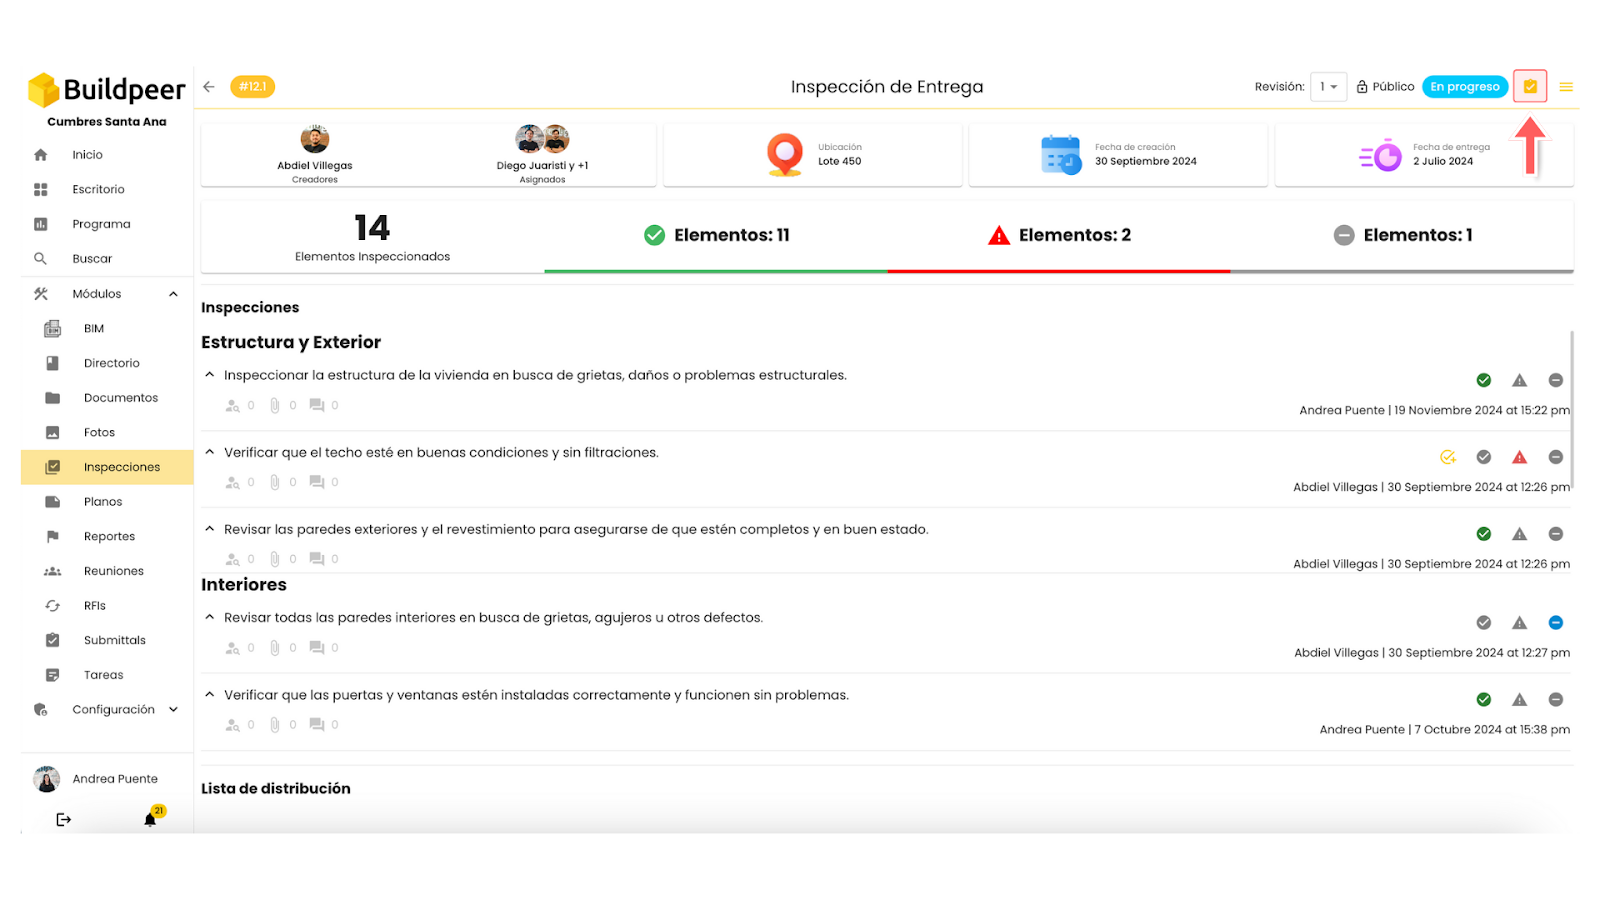
- At the end of the inspection, click on the 📋 iconSign to record your signature and validate that the inspection was carried out by you, in addition to saving the date on which it was carried out.
- The inspection will now appear on the main screen of the module with the status of 'Open'. Enter the inspection again and click on the icon 👁️ See details to access its content.
- To finish, select the 'Approve' O 'Reject', as appropriate to the result of the inspection.

📌 Note: Remember that if you reject an inspection, you have the option to create revisions and repeat this process as many times as necessary. Learn more about creating an inspection review.


