



- In your Buildpeer account, go to the project overview and select the project you want to enter.
- In the left sidebar, click on the section 'Modules', and then click on the module 'Inspections'.
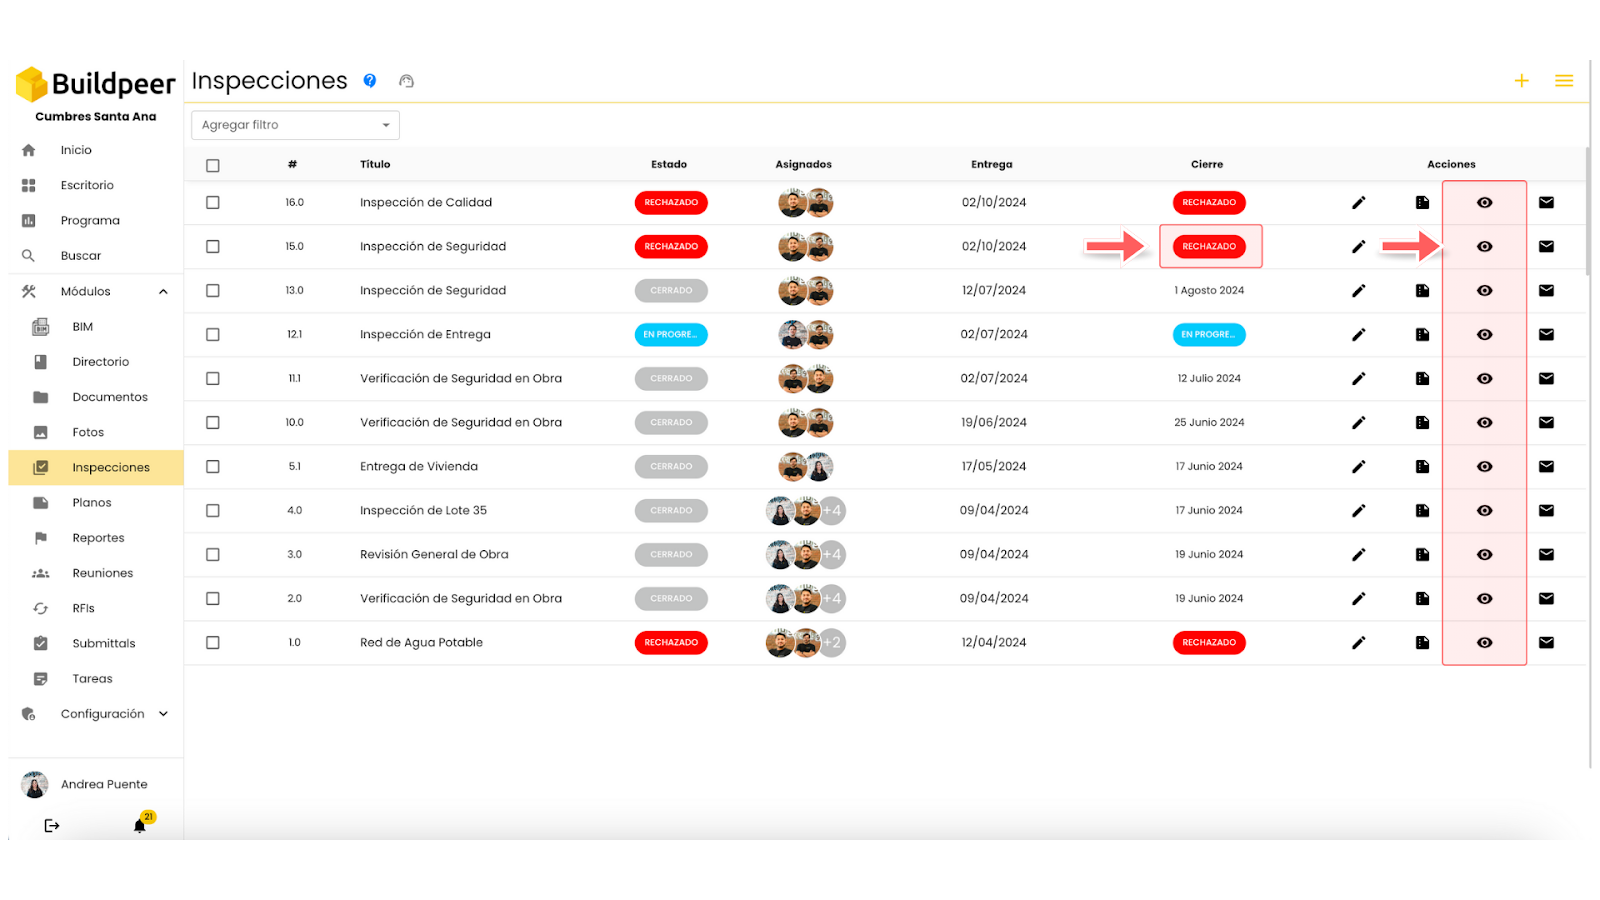
- On the main screen of the module, you can view all your inspections classified according to their status: In progress, Rejected O Closed. To create an inspection review, make sure it's in status Rejected. Then, click on the icon 👁️ View details to access the inspection.
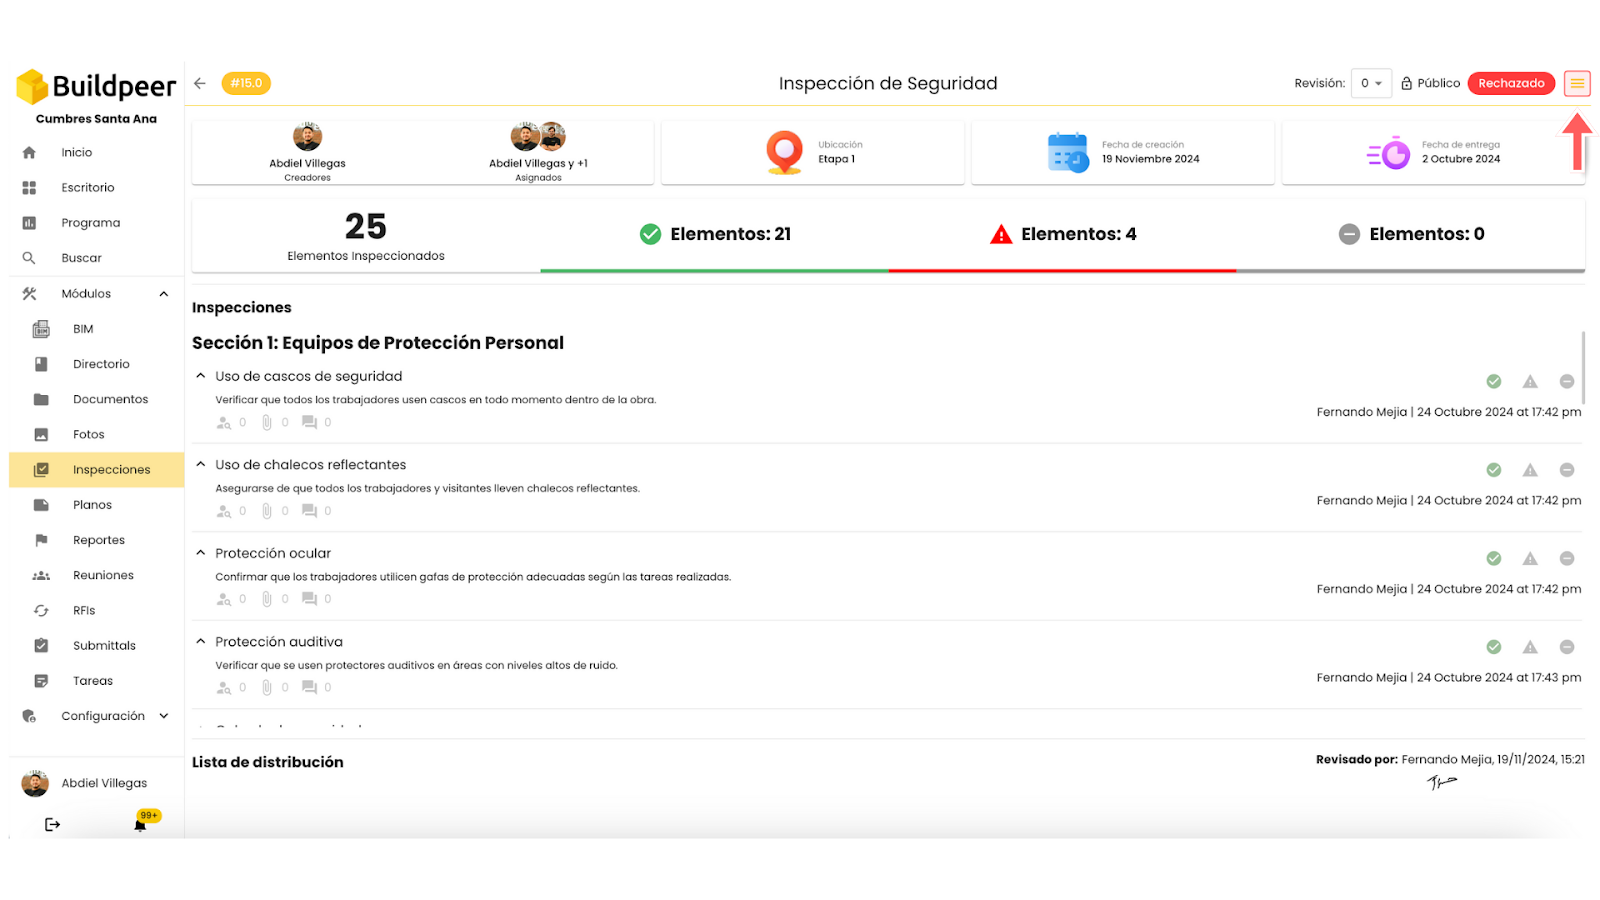
- At the top right, click on the 🟰 iconMás.
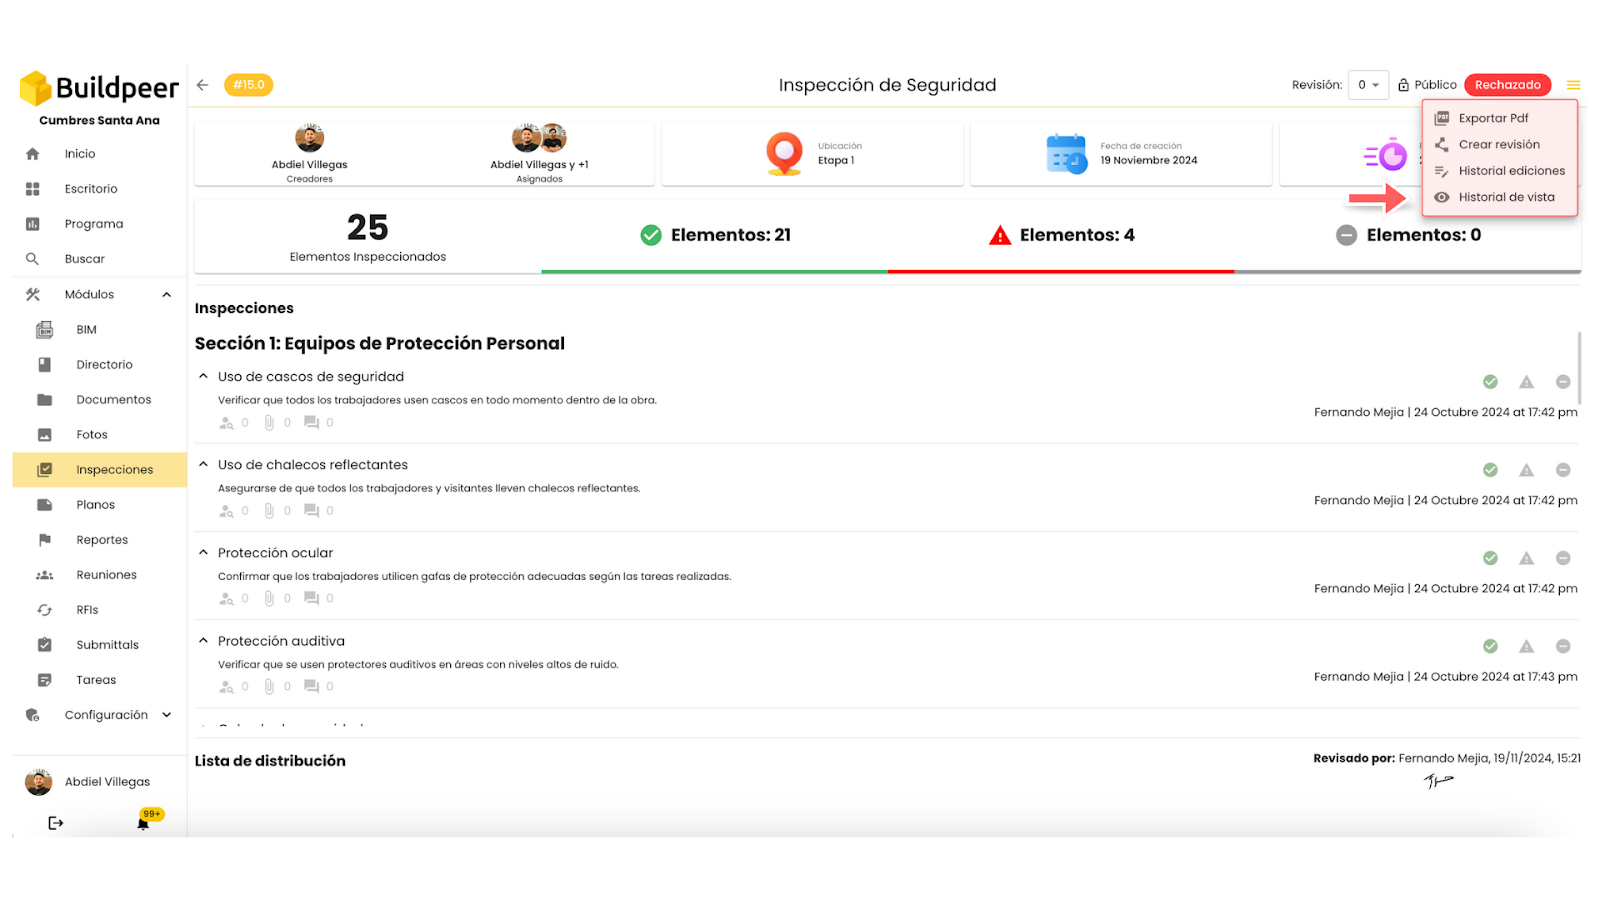
- Among the available options, select 🔗 Create review.
- Your inspection status will change to 'In progress', which will allow you to re-evaluate each of the elements included, sign the inspection and decide if it is approved or rejected as appropriate. Learn more about how to approve or reject an inspection.
📌 Note: Remember that if you reject an inspection, you have the option to create revisions and repeat this process as many times as necessary.
- Any revisions you make will be automatically saved in the inspection history. To access it, return to the module's main screen and click on the 📄 icon History.
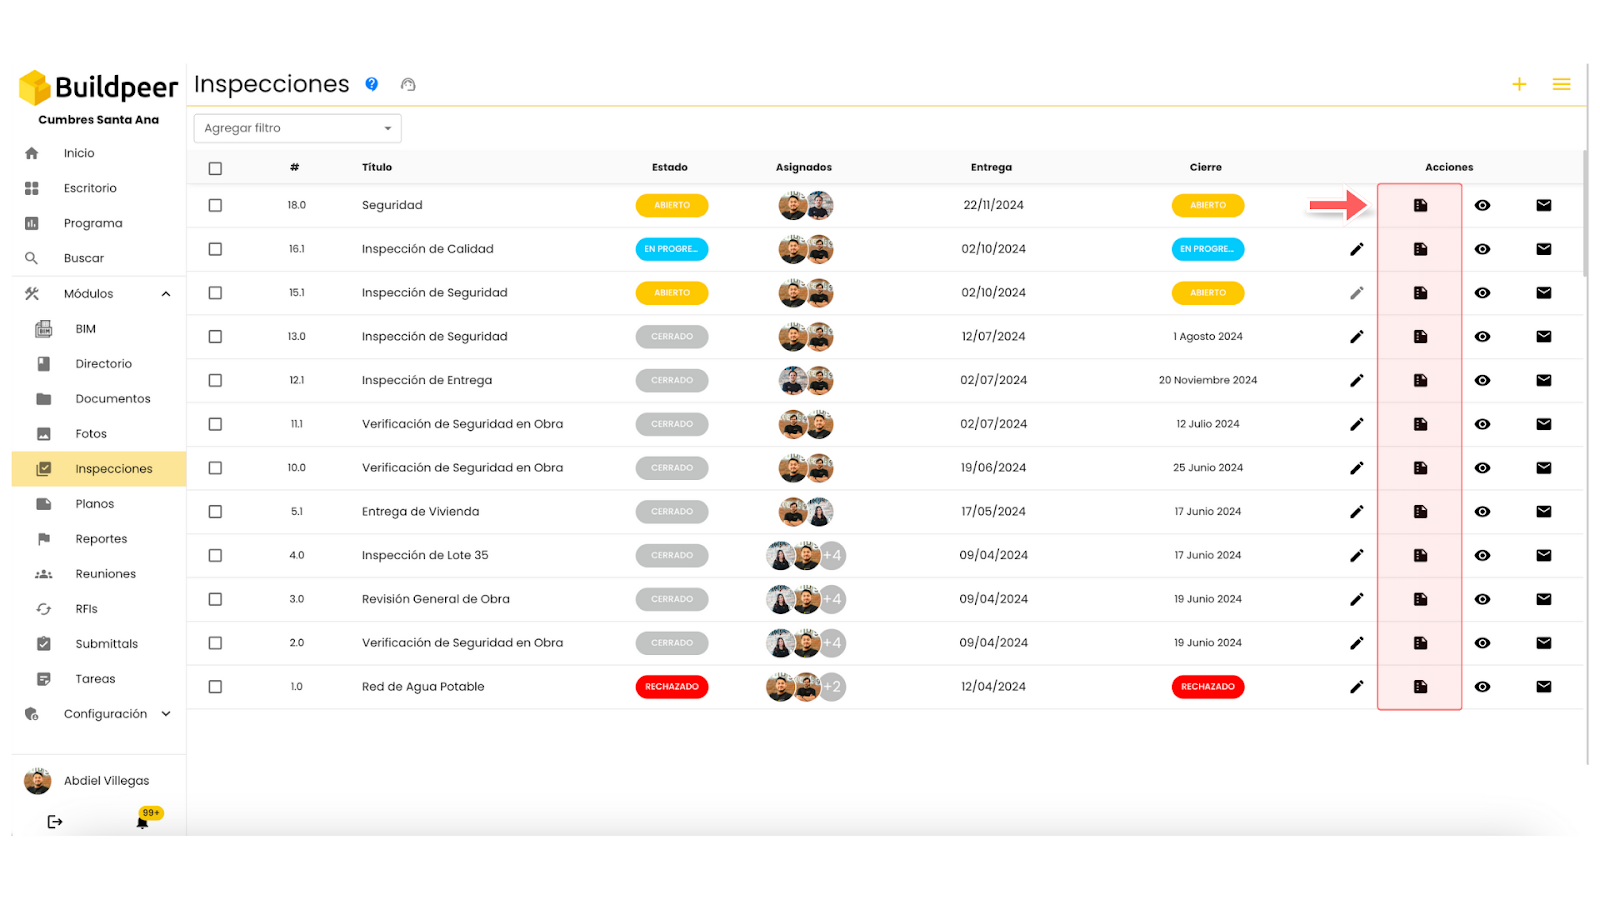
- You will be able to see the complete history of the inspection, including all the revisions carried out and the elements associated with each of them.


